April 21, 2024
This is for a Verci Monday circle, here is the link to the event and here is an archived version of the event description in case Partiful goes bankrupt.
Feel free to jump around the contents of this write-up; the intent was more to provide valuable information than to be a “to-be-listened-in-order” vinyl. Unless stated otherwise by the packages/libraries being used, any code snippets provided by me are written under the WTFPL.
Author note: After putting myself into a food coma from eating too many hotdogs at a bbq I hosted this past weekend and procrastinating till the last moment to write this up, the technical projects won’t be complete with code snippets or screenshots however will at the very least spell out the intended steps to follow.
Contents
- Peanut butter and jelly
- High fiving computers
- Debugging
- Making an Instagram meme generator
- Making a natural language search engine for movies
Peanut butter and jelly
I want you to take a pencil and paper (or document editor assuming you’re reading this on a computer) then write up a step by step recipe for how to make a peanut butter and jelly sandwich. Regardless if you have a nut allergy, you’d likely come up with something like the following:
1. Grab bread
2. Spread peanut butter
3. Spread jelly
4. Put bread together
5. Enjoy
Adding additional steps between #4 and #5 to cut the sandwich (whether diagonally or horizontally or orthogonally) is left as an exercise for the reader but we’ll quickly see that they’re not relevant for what I’m about to point out. Suppose someone other than you or I got ahold of your instructions and followed it very literally. In the case of the instructions I wrote above, this person could very well grab the entire loaf and then spread the ingredients while the bread is still in the bag. They’d skip step #4 since the bread’s already all together as a loaf but they’d fall short at accomplishing step #5.
So how do we wrangle this? How do we make a recipe for a peanut butter jelly sandwich that our very literal acquaintance could follow? The simple answer is by improving the specificity of the instructions you’re writing; here’s a first pass at improving the instructions I wrote earlier:
1. Obtain a loaf of bread, a jar of peanut butter, a jar of jelly, a plate, and two butter knives
2. Take two slices of bread from loaf and put them on plate
3. Open peanut butter jar and spread on bread
4. Open jelly jar and spread on bread
5. Put bread together
6. Enjoy
Here you can see the changes I made to steps #1 through #4 both make it explicit what resources are needed to proceed with the recipe (the amenities listed in step #1) as well as what exact actions to do on the ingredients (opening the jar of spread before attempting to apply to the bread). But, then again, there are pitfalls in this PB&J recipe. First, we don’t specify which slice or side of the bread to apply either spread to. Second, we don’t specify how we want to put the bread together in step #5 (why not balance them standing up like rocks by a stream). If you want to get silly with it, we also don’t specify that we’re supposed to get the peanut butter or jelly out of the jar before spreading; the instructions would be accurately followed if you were to roll the jar around on the bread.
Whether or not you want to continue trying to make a followable recipe and/or remain friends with this person is your decision but what you’ve just done is go through the motions of describing pseudocode as well as start “implementing” by turning the high level steps into more specific and repeatable steps. When you work on coding something, unless it’s a very direct small fix, odds are a way you can think about the thing you’re coding would be as a recipe for a peanut butter jelly sandwich that grows in specificity. For example:
1. Make a personal photography portfolio website
Turns into
1. Make a website with photos from my portfolio
2. Host the website with a custom domain so my friends can see it
Turns into
1. Make a website that presents a gallery of photos from an Airtable instance
2. Keep my Airtable with portfolio-worthy items up to date
3. Get the website deployed to a PaaS provider that supports custom domains
4. Acquire a custom domain and set up the needed DNS records
And so forth. Like how making a peanut butter jelly sandwich may require different levels of abstractions or degrees of specificity, the same applies to writing code. If you run into a point when coding something where you understand the high level goal of what you’re trying to accomplish (ie be able to log in with Apple) but are getting stumped as to why it seems impossible, a potential scenario is you’re trying to solve a broader task than what’s really needed for the one at hand (ie instead of solving web-based authentication as a field just using Apple’s OpenID provider).
High fiving computers
When you open a new tab in your browser, type “google dot com”, hit enter, and get presented with the famous search page, there are a lot of things going on. Without getting into the weeds of networking, the important topic to understand somewhat is HTTP and how computers communicate with each other. To help grok HTTP, remember when you’d have different secret handshakes with your peers? Imagine computers talking to each other as though they’re requesting different sorts of high fives. In the case of going to google dot com, what’s happening is your computer is asking Google if it can GET a high five:

When you make a GET request you’re asking another computer if you can get whatever’s offered at that resource. But suppose you want to not just request a high five but do so while providing your name (so whoever responds to your high five knows how to refer to you), then that’d be an example of a computer POSTing up a high five with data.

This is admittedly a very simplified summary of the HTTP GET and POST methods but the most you’d need to understand about them, unless you’re diving into API development, is that you make GET requests when you’re looking to simply request something and you make a POST request when you need to provide context with your request.
Debugging
The last meta point I will provide is how to go about debugging. Debugging, a concept that traces back to a literal bug, is the process by which you solve some issue within some existing program whether that’s debugging a small fizz buzz function you’re working on in a technical interview or you’re working on fixing a critical bug that’s affecting users on production. While every codebase and team will have different debugging resources available (ie documentation or static types), I’d like to offer the following abstract approach that may prove to be helpful if you find yourself banging your head against the wall struggilng to center a div: Either go top down or bottom up
That’s actually it, if there’s an issue in your code it’ll either show up if you start with a bird’s eye view then zoom in to the faulty variable or if you start with the expected interaction/invocation then zoom out to the faulty function that’s doing something it shouldn’t. To give anecdotal examples of how these could look in practice:
Top down
A friend shows you a side project they’ve been working on and the website they say used to work is instead rendering a 404 page. You start by looking at their codebase and noticing it’s an SPA written in React with react router to handle routing. You know different pages on different routes (ie google.com/images, google.com/memes) need to be defined somewhere so you Control-F the codebase for “route” and come across a Routes.tsx file, seems like where these routes would be defined. You open it and see a list of routes as well as the component to render for each of them ranging from /login to /profile/:userHandle/edit and then ask your friend what the route their previously working page was supposed to be on. They say they put a portfolio page under /portfolio but recently refactored a bunch of nested routes out. However, Control-F’ing for /portfolio in this file yields no results.
What is in the code is a page defined for /polio, you point out the typo to your friend and swift typing gets the app working again. Here we started from a bird’s eye view of “this app isn’t showing the expected page at some route” to “there was a mistype in the route property passed to a react router component” and this could have all been done without knowing React!
Bottom up
A friend (probably the same friend as earlier) is now complaining that the like button in their Android app isn’t working properly. You again pull up their codebase and Control-F for a file containing both “button” and “like”. You’ve found the one LikeButton.java file that’s likely containing the button your friend is referring to and immediatly spot a handleLikeButtonClick function which seems to be what gets invoked when a user clicks on the like button. It uses a utility function to get information about the currently logged in user and then uses a function written in another file to send the like “event” to an API. The utility function is very few lines and nothing stands out so you then look at the source code for the function that sends a like to the API.
Again, everything seems correct but then a funny statement catches your eye. You notice that, in the function that prepares a request to be made to the API, it actually makes a GET request when it’s meant to be a POST request with information about the post being liked included in the payload. Remembering that a high five with context is supposed to be a POST request you point it out and, again, their app was one fix away from having everything working. Here some prior context about HTTP methods was used but, odds are, if you’re developing both the client code and the backend, you’d catch some “Route not found” log statements indicating that GET requests to the API route for liking events are not handled.
Making an Instagram meme generator
To make it easier to develop on your computers as well as make it easier to get a shareable URL, I’ll be going through the these “projects” using Repl.it; so as long as you have a working browser you’d be able to follow along even using an iPad or Chromebook.
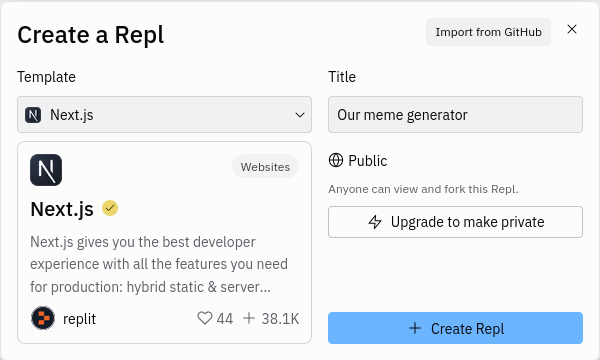
The first thing we’re going to do is get a scaffold up for a very basic web application using Next.js, a rather nifty framework for developing websites based on React. To get started using Repl.it, go ahead and create a new Next.js repl
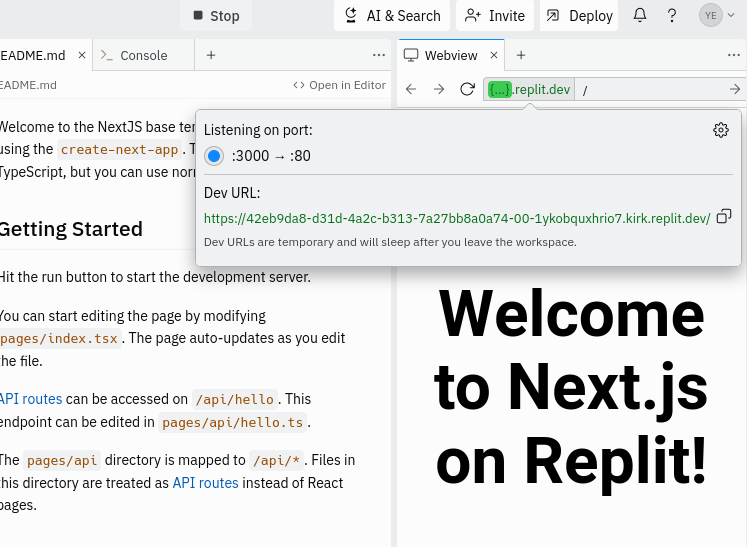
Without modifying the source code at all, you can verify that you’ve created a web app you can work with by clicking on the Run button an the top of the screen and viewing the website in the pane on the side. The URL that pops up when you click the replit.dev is a shareable URL that you’d be able to open in a separate tab in your browser.
If all you wanted to do was get a website out into the internet, you can close this tab now. However, if you’re interested in generating some memes, we’re going to make an app that takes a user’s Instagram posts, picks a random photo, overlays “Can I haz cheeseburger” text, and displays it to the user. The first step in accomplishing this is getting ahold of a user’s Instagram photos somehow and an easy way of accomplishing that is with SSO (like when you click a “Log in with Google” button to sign in to Facebook). Conveniently, there’s a package for Next.js apps that helps with streamlining the setup.
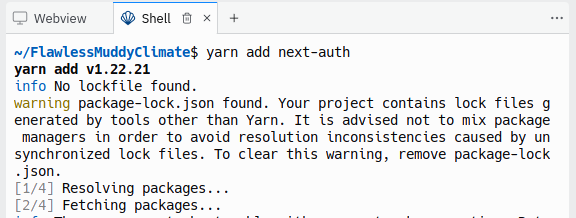
To install next-auth, open a Shell buffer and type in the following command
$ yarn add next-auth
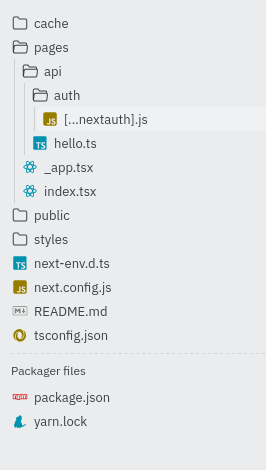
After a moment, you’ll have the package installed and can add in the file that’ll be used for telling next-auth what SSO to offer. Create a new folder under /pages/api named auth and create a file literally named [...nextauth].js so your overall structure would look something like the following:
Inside the [...nextauth].js file you just created let’s add the following contents
import NextAuth from "next-auth";
import InstagramProvider from "next-auth/providers/instagram";

export const authOptions = {
  providers: [
    InstagramProvider({
      clientId: process.env.INSTAGRAM_CLIENT_ID,
      clientSecret: process.env.INSTAGRAM_CLIENT_SECRET,
    }),
  ],
};

export default NextAuth(authOptions);
Walking through what the heck the code is doing:
import NextAuth from "next-auth";
import InstagramProvider from "next-auth/providers/instagram";
These import lines at the top of the file tell the program what external (as in code outside this current file) modules to load in order to evaluate the code below.
export const authOptions = {
  providers: [
    InstagramProvider({
      clientId: process.env.INSTAGRAM_CLIENT_ID,
      clientSecret: process.env.INSTAGRAM_CLIENT_SECRET,
    }),
  ],
};
This instantiates a JavaScript object with key/value pairs intentionally written in the way that the next-auth library would expect them. The process.env.INSTAGRAM_CLIENT_ID and process.env.INSTAGRAM_CLIENT_SECRET are references to environment variables that we’ll set up shortly.
export default NextAuth(authOptions);
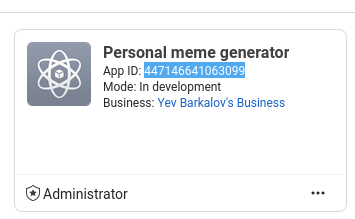
Like how we were able to import other code, using the export keyword sets up some code in the current file to be imported into another file elswhere and the default keyword means you’d be able to import the resulting NextAuth(...) value without having to name it as the specific value being imported. Before we add the login button to the website so a user would be able to go through that process, we’ll need to fill out those INSTAGRAM_CLIENT values. First, go ahead and create a new app in the Facebook Developers dashboard then copy the App ID string.
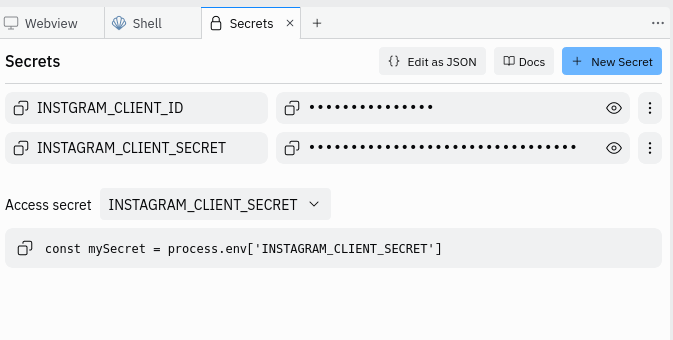
From inside Repl.it create a Secrets pane and fill out the INSTAGRAM_CLIENT_ID with the App ID string you just copied

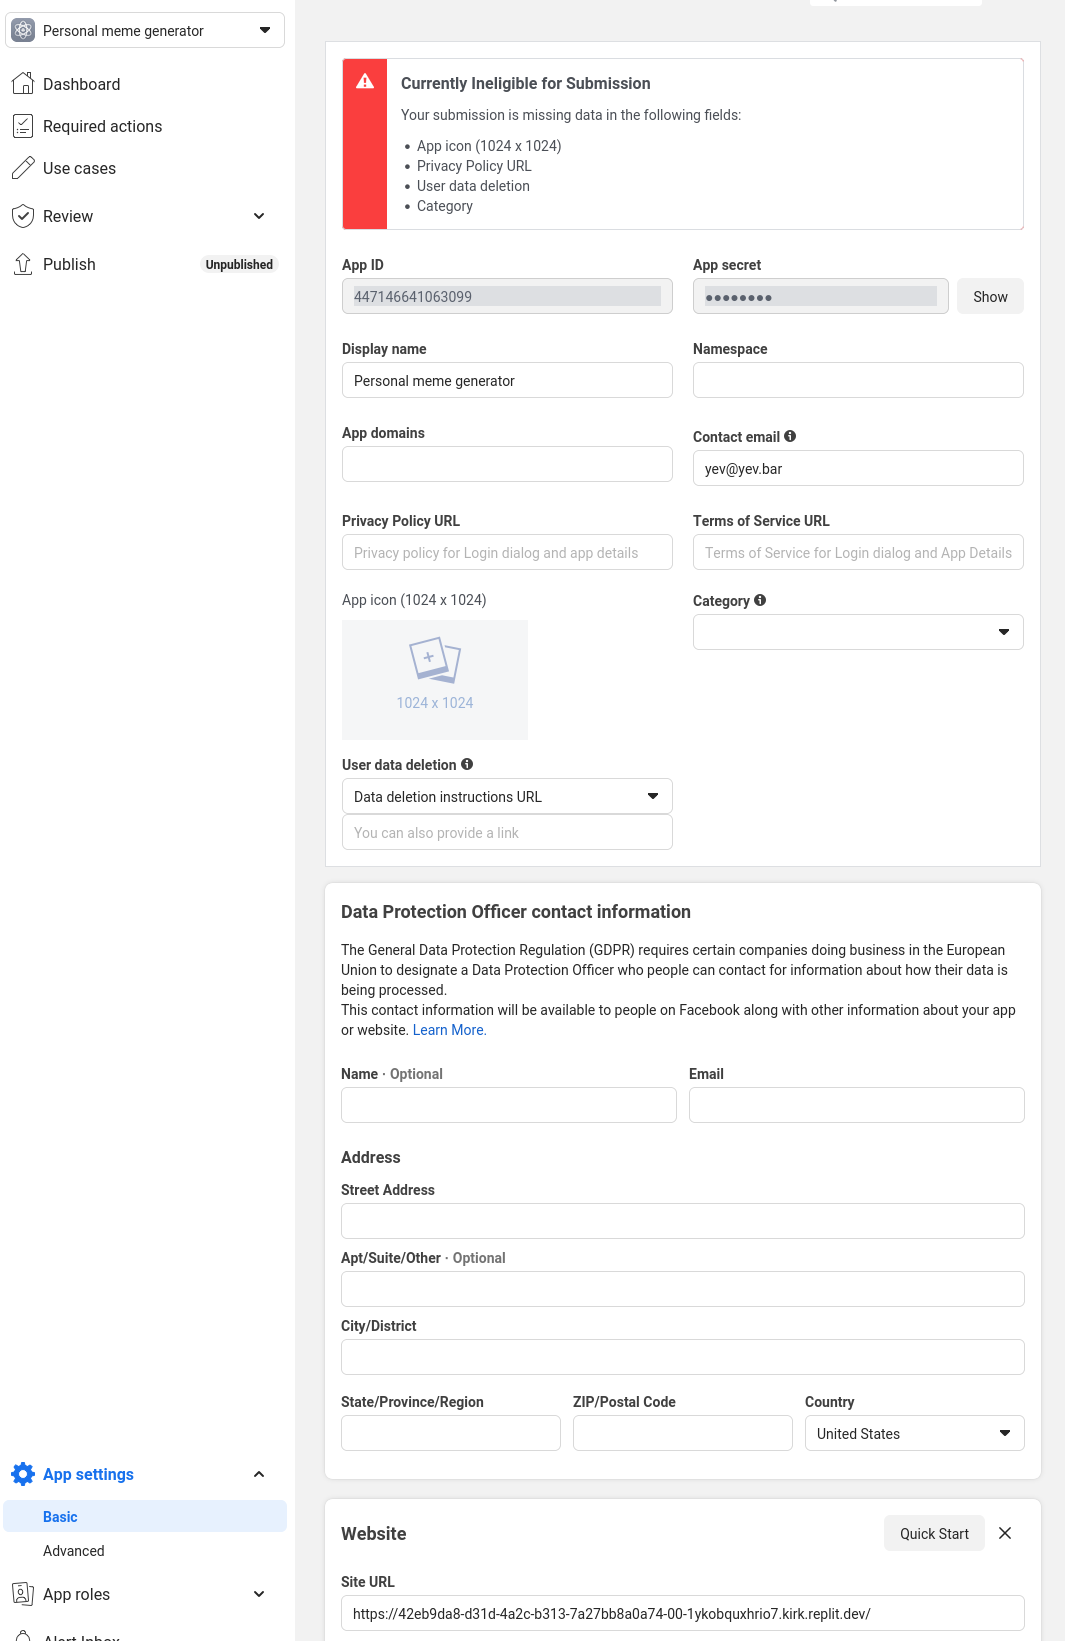
To get ahold of the INSTAGRAM_CLIENT_SECRET value, go to the app’s details page and click on the Basic settings in the left navbar then copy the value of your App Secret.
Then save it as a Repl.it secret under INSTAGRAM_CLIENT_SECRET
Now we have next-auth set up, let’s go and add a login button so we’d actually be able to make use of logging in to our app using Instagram. Open up the index.tsx file and replace the file’s contents with the following:
import type { NextPage } from "next";
import Head from "next/head";
import { signIn } from "next-auth/react"
import styles from "../styles/Home.module.css";

const Home: NextPage = () => {
  return (
    <div className={styles.container}>
      <Head>
        <title>Instagram meme generator</title>
        <meta name="description" content="Generated by create next app" />
        <link rel="icon" href="/favicon.ico" />
      </Head>

      <main className={styles.main}>
        <h1 className={styles.title}>Welcome to Next.js on Replit!</h1>

        <button onClick={() => signIn("instagram")}>
          Sign in
        </button>
      </main>
    </div>
  );
};

export default Home;
Unlike the other file I won’t be going into detail about what every line signifies here but what I will take a moment to point out is the thing being returned by the Home function
  return (
    <div className={styles.container}>
      <Head>
        <title>Instagram meme generator</title>
        <meta name="description" content="Generated by create next app" />
        <link rel="icon" href="/favicon.ico" />
      </Head>

      <main className={styles.main}>
        <h1 className={styles.title}>Welcome to Next.js on Replit!</h1>

        <button onClick={() => signIn("instagram")}>
          Sign in
        </button>
      </main>
    </div>
  );
If you’ve every worked with HTML+CSS or done an “Inspect Element” to a website you’ll be familiar with the <div> or <h1> tags however, since these are being written in a .tsx file these aren’t meant to be treated as literal HTML tags but instead JSX. The reason this technical distinction matters is because of the onClick attribute being set for the <button> tag is not a function that’d be valid in the regular JavaScript you’d run in your browser. It, as the attribute name denotes however, is simply the function we’re telling React to invoke when that respective button gets clicked on.
At the time of writing this it became clear to me that the correct CLIENT_ID and CLIENT_SECRET values to use would be for an Instagrm app and not a Facebook one. The instructions for getting those set up can be found here however, since I procrastinated on writing this up until the day of the event, I attempted to create a new Instagram app and it wouldn’t let me. So I’ll leave the code here as-is and hopefully come up with a working implementation at the event.
Here’s the step by step for those that’d like to self-direct their implementation of the project:
- Authenticate into Next.js app using auth.js
- Grab user’s posts
- Grab a random image
- Use something like sharp to write text to image
- Render resulting image to user
Making a natural language search engine for movies
Again, procrastinated to do this so here’s the intended step by step:
- Instantiate Flask w/ Flask-Meld application
- Train the doc2vec model on this movie dataset
- Every time the user enters a character, catch that event using Meld and find most similar documents to present as ‘results’